首页 » 【从零开始搭建网站】 » 正文
【从零开始搭建网站】3.2搭建网站——手动
2020-03-28 | 【从零开始搭建网站】 | 1 条评论 | 610 次阅读 | 468字
终于到了本专题的最后一篇(心里还是有点小激动的),在这一篇中,我来教大家搭建网站最麻烦的方法:手动搭建LNMP环境。话不多说,正文开整!
首先,用你的root用户分别执行一下命令,安装LNMP;
apt-get update
apt-get install nginx
apt-get install php-fpm php-mysql php-common
apt-get install mysql-server
这里注意一下,我这里使用的系统是Ubuntu 16,默认安装的是PHP7.0。如果你使用的是Ubuntu 18,那么默认安装的就是PHP7.2。
在安装MySQL的中途可能会叫你设置root密码,自己设置就好。
如果没有叫你输入root密码,则以后所有要求输入MySQL的root密码的地方全部直接回车,不用输入。
在所有东西都全部安装完成之后,在浏览器中访问你的服务器的IP地址或者你的服务器所绑定的域名时,就会看到下面的界面。
然后,就该配置你的nginx配置文件了。配置文件在这个文件夹里。
/etc/nginx/sites-enabled然后输入一下命令:
mv de* web.conf
nano web.conf
接着,编辑文件。我下面给出我的配置文件的参考,你们也可以自己配置
##
# You should look at the following URL's in order to grasp a solid understanding
# of Nginx configuration files in order to fully unleash the power of Nginx.
# http://wiki.nginx.org/Pitfalls
# http://wiki.nginx.org/QuickStart
# http://wiki.nginx.org/Configuration
#
# Generally, you will want to move this file somewhere, and start with a clean
# file but keep this around for reference. Or just disable in sites-enabled.
#
# Please see /usr/share/doc/nginx-doc/examples/ for more detailed examples.
##

# Default server configuration
#
server {
        listen 80 default_server;
        listen [::]:80 default_server;

        # SSL configuration
        #
        # listen 443 ssl default_server;
        # listen [::]:443 ssl default_server;
        #
        # Note: You should disable gzip for SSL traffic.
        # See: https://bugs.debian.org/773332
        #
        # Read up on ssl_ciphers to ensure a secure configuration.
        # See: https://bugs.debian.org/765782
        #
        # Self signed certs generated by the ssl-cert package
        # Don't use them in a production server!
        #
        # include snippets/snakeoil.conf;

        #这里写你的网站的文件目录,最好按照我的来写,因为下面的步骤都会以这个目录为例
        root /www/wwwroot;

        # Add index.php to the list if you are using PHP
        index index.html index.htm index.nginx-debian.html;

        #这里的ca.stephen-zeng.top要换成你自己的域名
        server_name ca.stephen-zeng.top;

        location / {
                # First attempt to serve request as file, then
                # as directory, then fall back to displaying a 404.
                try_files $uri $uri/ =404;
        }

        # pass the PHP scripts to FastCGI server listening on 127.0.0.1:9000
#
        #location ~ \.php$ {
        #       include snippets/fastcgi-php.conf;
        #
        #       # With php7.0-cgi alone:
        #       fastcgi_pass 127.0.0.1:9000;
        #       # With php7.0-fpm:
        #       fastcgi_pass unix:/run/php/php7.0-fpm.sock;
        #}

        # deny access to .htaccess files, if Apache's document root
        # concurs with nginx's one
        #
        #location ~ /\.ht {
        #       deny all;
        #}
}


# Virtual Host configuration for example.com
#
# You can move that to a different file under sites-available/ and symlink that
# to sites-enabled/ to enable it.
#
#server {
#       listen 80;
#       listen [::]:80;
#
#       server_name example.com;
#
#       root /var/www/example.com;
#       index index.html;
#
#       location / {
#               try_files $uri $uri/ =404;
#       }
#}
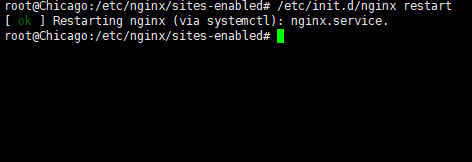
然后,你需要重启你的nginx服务器来使配置文件生效。
/etc/init.d/nginx restart
接着,执行以下命令
cd /
mkdir www
cd www
mkdir wwwroot
chown -R www-data wwwroot
chmod 777 wwwroot
然后,你就可以开心地将你的网站的文件给上传到你的网站目录里面去了。至此,手动搭建LNMP地教程就到此结束。还有一些关于配置文件地更多玩法,我都会放在【折腾】这个栏目中。我是Stephen Zeng,如果有什么写得不好或者你有什么建议或感想的,欢迎在评论区畅所欲言。我们下篇文章再见!
本篇文章未指定许可协议。
发表评论
已有 1 条评论
arrow_back
上一篇
arrow_forward
下一篇
我那个欧洲的服务器已经吃灰吃了几个月了。。。